MAKE YOUR OWN BUNDLE - BUY ANY 3 SVGS - GET 30% OFF

Laura Shirley | 24 days ago

Step-by-Step Projects & Inspiration: Started

Project Instructions

1. Don’t Settle for "Cheap" Paper

When I started, I bought the cheapest cardstock I could find, thinking I was being thrifty. Big mistake! It ripped constantly and the edges looked like they’d been chewed by a lawnmower.


The Lesson:

Aim for a solid

65lb to 80lb

weight. Good quality cardstock has longer fibers that hold together under the blade, giving you those crisp, clean edges we all crave.

2. Keep a Close Eye on Your Blade

I used to be the queen of using my blades for way too long. I’d keep trying to "make it work" until my machine was basically just dragging a dull knife across my projects.


The Lesson:

Now, I keep a log for both my

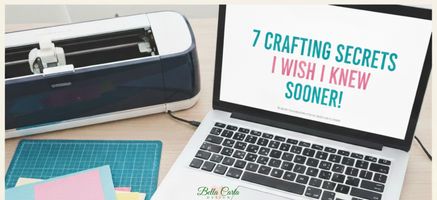
Silhouette Cameo 4

and my

Cricut Maker 3. I write down exactly when I swap in a new blade. Trust me, staying on top of this makes a world of difference in how precisely your machine cuts!


For me, with how often I use my machines (usually daily, OK, I’m an addict!) I have to change my Cricut blade at least once a month and for my Silhouette, it is more like every 3 weeks.

3. Love Your Mats (And They’ll Love You Back)

In the beginning, I’ll admit I was a bit... well, let’s just say relaxed about cleaning my mats! I’d leave those tiny little paper scraps behind, which created tiny bumps that led to uneven cuts. But the real headache? If I left a finished project on the mat for too long, it would practically fuse to the surface, making it a total nightmare to scrape off. It took me quite a few "oops" projects to realize that my dirty, tired mats were the secret culprits behind my crafting frustrations.


The Lesson:

Now, I clean my mats immediately after every use. It keeps the "sticky" just right and ensures the paper stays flat.


When to say goodbye:

You’ll see plenty of "hacks" online claiming you can wash an old mat with soap and water to bring the stickiness back to life. Honestly? I’ve tried them all, and in my experience, they just don't work. Once a mat loses its grip and the paper won't stick completely anymore, it’s time to let it go. Trying to save an old mat usually just leads to ruined paper and a lot of frustration. When in doubt, start fresh!

4. Master the "Flip and Peel"

When I first started, I’d pull the paper off the mat and end up with a card that curled like a pigtail. It was so frustrating!


The Lesson:

Instead of pulling the paper off the mat,

flip the mat face-down and peel the mat away from the paper.

This keeps your cardstock perfectly flat and professional-looking every single time.


Bonus Tip:

I like to put the mat cover (the plastic or stick-free cover that comes with a mat) on my work surface and lay the mat face-down onto it, while pulling it away from the paper, so the mat doesn’t pick up any tiny scraps of paper that might be on my table. This is especially important when your sheet of paper is smaller than the mat.

5. Give it a Good Roll

I used to think my hands were enough to press the paper down, but air bubbles are sneaky! I could swear that cardstock, especially heavier weights, have a mind of their own!


The Lesson:

Get yourself a

brayer

(a little rubber roller). Giving your paper a quick roll across the mat ensures every inch is stuck down tight, so the blade doesn't "drag" or snag the paper mid-cut.


Bonus Tip: Sometimes your brayer can pick up glue and/or paper scraps while you’re rolling. To keep the cardstock extra clean, I sometimes put a piece of wax paper or paper towel between the paper and brayer. Especially if you think the glue is going to “squish” out a piece of paper towel can mop that up while you’re rolling. My craft room is always stocked with a roll of wax paper and paper towel from the Dollar Store.

6. The "Test Cut" Saves Lives (and Paper!)

I can’t tell you how many sheets of gorgeous glitter cardstock I ruined because I didn't check my settings first.


The Lesson:

Always,

always

do a tiny test cut (like a 1-inch circle) in the corner of your paper first. It takes ten seconds and saves you so much heartache.

7. Start Simple to Build Your Skills

We all want to jump into the super-intricate lace designs or complex pop-up cards on day one. But those can be tough to handle when you're still learning your machine's "personality."


The Lesson:

Start with designs that have fewer or no score lines and fewer tiny pieces. As we work together, I’ll show you exactly how to level up to those delicate, "wow-factor" projects.

I promise, even if you feel like you’re struggling today, you’ve got this! I’m still learning new things every time I turn on my machines, and I can't wait to see what you create.

I’d love to hear from you—what’s the one thing you’re most nervous about trying with your new machine? Reply and let me know!


Let’s create what matters — together.

Laura Shirley

More Posts

The Ultimate 3D Paper Crafting Glossary: Your Friendly Guide to Cricut  Silhouette TermsThe Ultimate 3D Paper Crafting Glossary: Your Friendly Guide to Cricut  Silhouette Terms
The Ultimate 3D Paper Crafting Glossary: Your Friendly Guide to Cricut Silhouette Terms

Hello there, creative friend! 💖

If you’ve ever looked at a gorgeous, intricate 3D paper project and thought, "That looks absolutely magical, but what on earth do all these terms mean?"—please know you are not alone! When I first bought my electronic cutting machine, I felt completely overwhelmed by letters like "SVG," words like "basis weight," and software buttons I didn't understand. I made every "rookie" mistake in the book so you don’t have to!

My mission at Bella Carta Design is to make 3D paper crafting joyful, accessible, and completely frustration-free. Think of this glossary as your cozy, trusted crafting companion. Grab a warm cup of tea, and let's demystify these terms together so you can start creating cute crafts with paper and heartfelt hand craft gifts today!

<p>How To Avoid the RED MAT in Cricut</p><p>How To Avoid the RED MAT in Cricut</p>

How To Avoid the RED MAT in Cricut

Step by step instructions on setting score lines


If you’ve ever uploaded an SVG file and hit "Make It" in Cricut Design Space only to see that dreaded red mat with all the scattered lines, you aren’t alone! It’s one of the most common hiccups when working with SVG files in Cricut Design Space.

Usually, this happens because the software thinks your score lines are meant to be cut lines, or it doesn't realize those lines are supposed to stay stuck to your project. Don't sweat it—here is a quick, friendly guide to getting those files fixed and your project back on track.


<p>FAQs:</p><p>FAQs:</p>

FAQs:

Find solutions for paper craf cutting and software issues with Silhouette, Cricut, Brother ScanNCut and others. Find craft ideas for hand craft gifts, cricut projects, 3d svg files, and pop up card svg setups.

<p>Paper Crafting Resources</p><p>Paper Crafting Resources</p>

Paper Crafting Resources

Hi There!

I LOVE paper crafting! Over the years I've found a few tips and tricks to enjoy it even more. 

Below are Tutorials, FAQs, Blog articles and other resources that I hope will help you get the most out of paper crafting, whether you are a newbie or an "old hand" at working with paper.

Laura